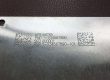
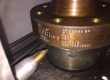
A Data Matrix code (a small square barcode) grades well on the marking table. Then the part comes back from heat treat and shot blasting, and the barcode reader sees a grey smudge. The mark was fine. It was put at the wrong step.
Mark as late as you can: after the last step that can cut, heat, coat or blast the surface. By mark we mean anything you put on the part: text, a serial number or a Data Matrix code.
Sometimes the mark must go on early, for a heat number (the batch ID from the steel mill) or work-in-progress tracking. Then use a mark with real depth, such as deep laser engraving or dot peen, not a colour-only black mark. Keep it off bend zones and machined faces, and read it again after the last damaging step.
At HeatSign we mark sample parts at the step a customer plans, then run them through the real route. Below: a step-by-step cheat sheet, which marks survive which process, bend-line distances and two example routes.
All three answers “no”? Mark whenever it suits your line. Choosing a machine? Jump to which marks survive.
Should you mark parts before or after processing?
Mark after processing by default. Mark before only when the ID has to travel through the route, such as a heat number going into the furnace, or when a flat blank is easier to fixture than the finished part. Then choose a mark with depth and place it where later steps will not touch it.
The standard most supplier drawings point to says the same thing. MIL-STD-130 (the US military part-marking standard) asks that the marking method “account for final finished condition of the item including paints, coatings, and sealants”. In plain words: judge the mark on the finished part, not on the marking table.

Which marks survive which process step?
Marks with depth survive heat, blasting and coating; colour-only laser marks do not. A black annealed mark fades at about 200 °C (392 °F). Deep laser engraving and dot peen marks read again after heat treatment and cleaning. Shallow marks get flattened by shot blasting.
Half of the “before or after” question is really “which kind of mark?”. A fiber laser marking machine can make three very different marks on steel. An annealed mark changes the surface colour with heat and removes no metal. An etched mark removes a thin layer. A deep engraved mark cuts a pocket you can feel with a fingernail.
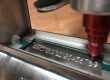
Dot peen is different again: a hard carbide pin punches rows of small dents. The dents move with the metal, so they survive heat and bending better than a colour change.
Two European laser makers, TRUMPF and Trotec, publish the 200 °C limit for annealed marks. NASA tested marks after heat treatment to 1,093 °C (2,000 °F): laser engraving and dot peen were rated “restorable to readable”, while paper labels and ink failed (NASA-STD-6002D, Tables 7 and 8).

Machines for marks that go through the route
Pick the machine by the latest step the mark must survive. HeatSign builds both laser and dot peen machines, so these suggestions cover both sides.
 Desktop fiber laser marker, 20–60 W · $1,950–5,000Etched and engraved serial numbers and Data Matrix codes on machined parts.See the desktop fiber laser →
 Deep laser engraver HS-FL35D / 60D · $2,900–3,900Motorized Z axis for pockets that survive blasting and heat treatment.See the deep laser engraver →
 MOPA laser marker, 30 / 60 / 100 W · $3,500–6,000Black marks on anodized aluminum and stainless steel, applied as the last step.See the MOPA laser marker →
 Benchtop pneumatic dot peen marker · $1,500–2,800Heat numbers on castings and forgings that get heat-treated or painted later; steel up to 60 HRC.See the pneumatic marker →
How far from a bend line should a part mark be?
Keep a part mark at least 15 mm (0.6 in) from a bend line, or use your fabricator’s hole-to-bend rule if it is larger. Run the rows of a Data Matrix code parallel to the bend. Never mark inside the strip the press brake die touches.
Marking the flat blank is the right habit in sheet metal. The part lies flat, and the laser or dot peen head sees one height. The problem is the bend zone. The outer surface stretches, and the die shoulder presses lines into the sheet.
A Data Matrix code also needs a blank border around it, the quiet zone. So a mark near a bend loses more than its own width.
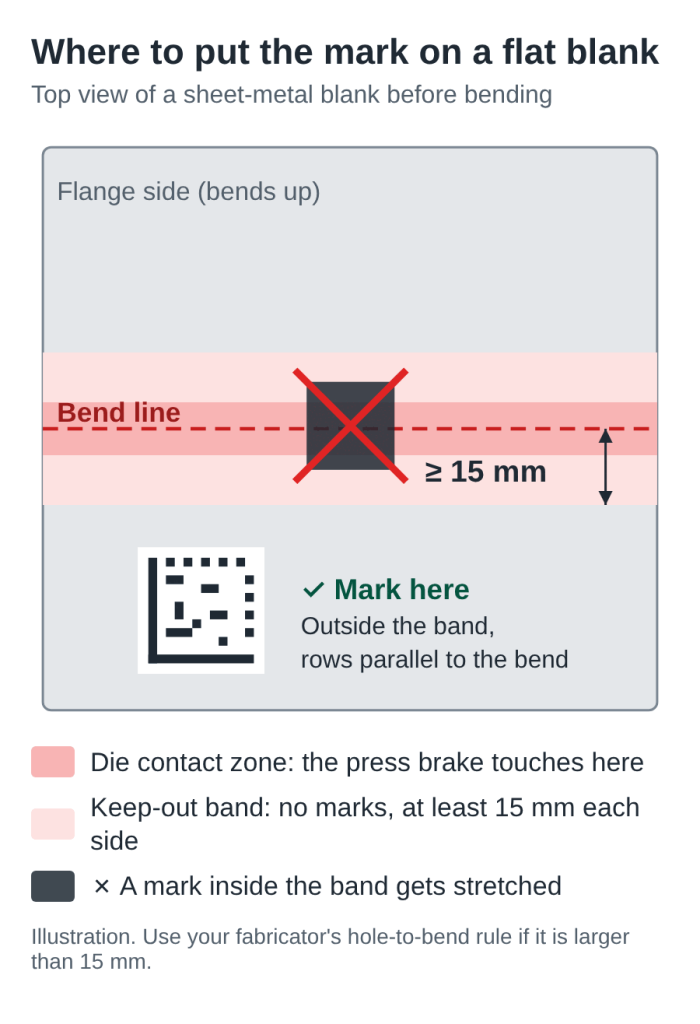
No sheet-metal guide we found gives a distance for marks. They give one for holes, so treat the mark like a hole:
We use the larger 15 mm figure because a Data Matrix code has no spare edge. A hole that moves 0.2 mm still takes a bolt. A Data Matrix code whose outer cells stretch can drop a full grade, which is why HeatSign sets up sheet-metal jobs with this margin.
Tubes follow a stricter rule. The US Navy marking standard bans marks on thin-wall pipe “in areas which will be bent after marking” and on areas that will be flared (MIL-STD-792F, 5.10.3.1).
If a part needs its mark after forming, dot peen handles the curve and the height change. Laser marking a curved surface works too. Keep the Data Matrix code under 16% of the diameter, as the automotive 2D marking guideline (AIAG B-17) advises.

Not sure where the mark fits on your blank? Send us the flat pattern drawing and we will suggest a spot.
Should you mark before or after machining, deburring and blasting?
Mark after machining, or mark only on a face that is never cut. Machining removes the mark completely. Shot blasting flattens shallow laser marks, so a mark that must survive blasting needs pockets about 0.3 mm (0.012 in) deep and cells about 0.6–0.7 mm wide.
Forgings and castings often get two marks. The first goes on the rough surface for the heat number. Before final machining, the ID is copied to a low-stress area that is not cut again. A forging-line patent from SMS group describes this, because the first mark is “removed and can no longer be read” after turning.
MIL-STD-130 makes the same point from the other side: marks formed in the casting or forging are for non-machined surfaces only. Cutting oil and coolant do not remove a mark. NASA rated dot peen and laser marks readable after lubricating oil and hydraulic fluid. Oil only causes glare for the barcode reader, so wipe the part before you read it.
Blasting is the real risk. These numbers come from die-casting tests published by Laserax (a Canadian laser maker) with a university partner.

For scale, a human hair is about 70 µm thick. Buffing does the same damage in a quieter way. One machinist on Physics Forums found that polishing a blade after marking removed the laser contrast, and the phone could no longer read the Data Matrix code.
For coatings over blasted steel, such as galvanizing and paint, see how deep to mark so the mark stays readable after painting or galvanizing.
Can a laser mark survive heat treatment?
Yes, if it has depth. A black annealed laser mark fades at about 200 °C (392 °F), so it will not survive hardening, tempering or stress relief. Deep laser engraving and dot peen marks survive and read again once scale is removed. Mark before post-weld heat treatment.
Hardening, most tempering, stress relief and post-weld heat treatment (PWHT) all run well above 200 °C. That is why a black mark on a gear blank comes out of the furnace gone. An annealed mark is only a thin oxide layer. Heat it again and the colour changes back.
Deep marks survive the heat but get covered by scale (the dark oxide skin from the furnace). Plan a descale or blast step, then read the mark again. In Laserax tests, laser marks on cast aluminum stayed legible after T4 (500 °C for 1 hour) and T6/T7 treatments (520 °C for 4 hours).

HRC is the Rockwell C hardness scale. HeatSign dot peen markers handle steel up to 60 HRC, but depth drops fast near that limit. Check where your part sits on the hardness conversion chart.
Marking parts that go through the furnace? Send us the material and heat-treat temperature and we will suggest a mark type and depth.
Why sharp stamps are a risk before quenching
A deep, sharp stamp mark can start a crack when the part is quenched. Larrin Thomas at Knife Steel Nerds examined three broken knives, and all three fractures started at the maker’s stamp. The US Navy standard calls die stamping “not a preferred marking method” because it adds residual stress (MIL-STD-792F, 5.5).
Dot peen dents are round, and laser engraving can be kept shallow. Put any mark in a low-stress area, away from fillets, thin walls and fatigue-loaded faces. Our MSS SP-25 marking guide shows how valve makers choose low-stress spots.
Knife makers learned this early. One maker on KnifeDogs put it simply: “If one is going to have a blade (folder) engraved, this must be done in the annealed state.” Annealed here means soft, before hardening.

Should you mark before or after anodizing, plating or passivation?
It depends on the finish. Anodizing works either way: mark before for an unbroken coating, mark after for a white high-contrast mark. Plating and black oxide: mark before, with depth. Stainless passivation: mark before and use a passivation step matched to the mark.
Anodizing
Anodizing grows an oxide layer on aluminum. A Type II layer is 1.8–25.4 µm thick, and a hard Type III layer is 12.7–115 µm, according to the Aluminum Anodizers Council. Part of that layer grows into the metal. A colour-only mark under it gets converted or hidden; a mark with real depth shows through.

Apple’s patents give the clearest data. Marking before anodizing left the coating “free of laser-induced cracks” (US10787753B2). In another Apple test, dark laser marks made on anodized 7000-series aluminum showed corrosion on about 10% of the marked area after 72 hours of ASTM B117 salt spray (US10174436B2).
That is why aerospace buyers ask whether marked spots on anodized parts need a touch-up. Products Finishing magazine answered that the buyer and the finisher should agree on it in the contract. For machines and settings, see our aluminum marking machine guide.
Anodized, plated or passivated parts? Message us your finish sequence and we will mark test pieces for your line.
Plating, black oxide and galvanizing
Mark before plating, and engrave deep enough to show through. Black oxide and decorative chrome are far thinner than a laser mark is deep. A mark made afterwards cuts straight through and leaves bare steel that can rust. Hot-dip galvanizing adds much more zinc; for heavy coatings, follow the depth rules in our painting and galvanizing guide.
Passivation and electropolishing
Passivation (an acid cleaning step that restores the chromium oxide film on stainless steel) can fade a laser mark. In a Laser Focus World article, Coherent engineers found that failed marks had about 15% less chromium than the base metal. They also found citric acid gentler on marks than nitric acid.
The safe order is mark first, then passivate with a step matched to the mark. FOBA and Add’n Solutions tested UDI-marked surgical instruments this way. After ASTM A967 passivation and 500 cycles of pH 14 cleaning and steam sterilization, the Data Matrix codes were still readable.
Electropolishing removes a thin layer of metal from every surface, enough to erase a colour-only mark. A mark with depth does survive. In a published case study, Data Matrix codes laser-engraved on 316L stainless valve parts before electropolishing stayed machine-readable.
What do real marking routes look like?
Two routes cover most of what we see: a sheet-metal part marked on the flat blank, and a forged part marked twice. In both, the mark goes on early only where the ID must travel, and every mark is read again after the last damaging step.
Route 1: sheet-metal bracket, powder coated
- Laser cut the blank. The part is still flat and easy to fixture.
- Mark here. 15 mm (0.6 in) from every bend line, rows parallel to the bend.
- Press brake bending. The mark stays flat and outside the die zone.
- Powder coat. Engrave deep enough for the coating thickness.
- Read the mark. Final check on the coated part.
Route 2: forged steel shaft, heat-treated and machined
- Forging. Dot peen the heat number on the rough surface.
- Rough machining. Keep the marked face uncut.
- Quench and temper. The mark survives; scale covers it.
- Descale or shot blast. Read the heat number again.
- Final machining. Mark a Data Matrix code on a low-stress, finished face.
- Read the mark. Grade it on the finished part.
- 1
Mark a sample at the planned step
Same machine, settings and position as production.
- 2
Run every real step
Bend, heat-treat, blast, coat or passivate it exactly as production will.
- 3
Read it twice
Right after marking, and again after the last step that can damage it. For grades, see readable vs verifiable marks.

Send us your process route and a sample part
HeatSign will mark it at the step you plan and send photos, usually within one business day.
What else do fabricators ask about marking before or after processing?

Does a black laser annealed mark survive heat treatment?
No. Annealed marks fade at about 200 °C (392 °F), below normal hardening, tempering and stress-relief temperatures. Use deep laser engraving or dot peen before heat treatment, then read the mark again after descaling.
Should I laser engrave aluminum before or after anodizing?
Both work. Engrave before anodizing for an unbroken coating and a subtle mark; it needs real depth to show through. Mark after anodizing for a white, high-contrast mark, and agree with your buyer whether the exposed aluminum needs a touch-up coat.
Do I need to passivate stainless steel after laser marking?
Usually, for medical and food parts. Mark first, then passivate with a process matched to the mark; citric acid is gentler on marks than nitric. HeatSign can mark test pieces so you can check them through your own passivation line.
Not sure where the mark belongs in your route?
We see the same three mistakes again and again. A black annealed mark goes into the furnace and comes out gone. A Data Matrix code sits on a face that is machined later, or right next to a bend line. And nobody reads the mark again after heat treatment or blasting, so the problem shows up at the customer.
Start from your process route, not from the machine. Write down every step after marking. Find the last one that can cut, heat, coat or blast the surface, and ask whether the mark can wait until after it. If it cannot, pick a mark with depth and test one part through the whole route.
Send HeatSign the route and a sample, and we will mark it at the step you plan.

Sources
- NASA-STD-6002D, Applying Data Matrix Identification Symbols on Aerospace Parts (Tables 5, 7 and 8)
- MIL-STD-130N with Change 1, Identification Marking of U.S. Military Property (4.3, Table II)
- MIL-STD-792F, Identification Marking Requirements for Special Purpose Components (5.5, 5.10.3.1, 5.10.7)
- Aluminum Anodizers Council, Anodizing Reference Guide
- Larrin Thomas, How Stress Risers Lead to Broken Blades, Knife Steel Nerds
- Laser Focus World: tests on surgical instruments (FOBA and Add’n Solutions); selecting lasers for marking corrosion-resistant surfaces (Coherent)
- Apple Inc. patents US10787753B2 and US10174436B2; SMS group patent US12607991B2
- Design guides from Protolabs and SendCutSend; die-casting marking papers from Laserax; Bodycote S³P laser marking note; TRUMPF and Trotec notes on annealing marks